
The Examination topics in the help system give detailed information on the examination process, and provide insights into how PlanTest works. There are often more than one way something can be done, and ultimately, we hope to cover nearly all the possible options. The topics follow the designed purpose of PlanTest as a decision support tool for cadastre.
An examination will generally follow a path similar to the diagram above. We will describe the goals and actions of the following steps:
We added two additional steps to the conceptual diagram, because we need to describe to tools you use to investigate errors, and the check the status of the examination. Of course, an examination may not be quite so linear.
There is more than one way to start an examination in PlanTest. If started from job control or command line, the start parameters can accomplish quite a lot. PlanTest will usually be initiated by a job control application, as part of a complete jurisdictional workflow. When initiated by job control, all data, services and necessary permissions will be set up automatically.
When you start PlanTest without parameters, you need to use PlanTest menus and controls to:

Once data is loaded, the data decides the workflow that is used. The imported data contains properties that define the type of plan or submission. Depending on the type, the associated workflow is loaded and is visible then in the Workflow Control window.
For a more in-depth discussion of startup options read more...
Analytic tests can save a lot of time and effort, and in some cases perform analysis you could never do manually. Every site will have its own set of analytic tests allocated across any number of workflows, with some tests used in nearly all workflows.
You can run tests by three methods:
As discussed in the start section, you can automate execution of all tests on startup. The progress window, shown below, will be displayed depending on your options settings.

If you are working ad hoc, or simply want to rerun a group of tests, the main menu Analysis submenu lets you choose to run all tests, or only those which have no decision. Progress can be shown depending on option settings.

Depending on your option settings, you will see the same progress window as above.
If a step has an associated test method, you can run the test by double clicking the text of the leaf node of the workflow control.
Basic Use
 text to right of checkbox.
Analytic tests may produce the following types of results:
Each analytic test will have its own specification for fail conditions, when and what messages are recorded, and the records shown in tables. In particular, table columns are specific to each test, the test's records may have complex groups, and each test may define specific record to map feature and or graphic associations.
There are two main windows for viewing results, each with their own help section:
Most of the time using the standard review methods will be enough. The analytic results point directly to the data that caused a fail condition, and the standard use of the Test Results window and map navigation from table records to features is a quick way to see faults. Sometimes you need to search for context using other data, or use tools to make ad hoc calculations.
The windows, tools and reports available will depend on your data models as jurisdictional adaptation and customization. The detail pages for the suggested items below tipically contain notes on specific techniques of use.
Refer to these tools and reports for methodologies to use in your investigations.
Most steps require a decision before the exam can be finalized. PlanTest provides several ways to make decisions efficiently, for both analytic tests and .
Decisions can be made in three work areas:
For an in-depth discussion of Decisions in PlanTest, see Decisions...
The current status of decisions on the examination are always readily visible in PlanTest in one of two windows: the Workflow window, or the Results & Decisions window. The Workflow window shows the decision status by checkboxes and color coding the nodes and leaves of the workflow tree. read more...
The Results & Decisions window represents workflow steps as table records - rows are color coded by the decision states. The R&D window shows more information than the Workflow control. Columns show examiner comments, analytic messages, as well as the analysis result and decision.read more...
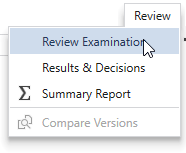
There are also special reports under the Review Menu: the Examination Review Report which shows a complete table of the status of all steps for an ongoing examination, and the Summary Report which shows high level examination statistics.
Once all workflow steps have been completed, the plan either has passed or has not. The specifics of finalization depend on the jurisdictional customization, so are not detailed. Generally, the first steps of finalization will include checks to determine the status of the examination, and provide an opportunity to complete necessary steps or resolve issues prior to calling other processes.
There may be automated steps to push rejected plans into a messaging system that will convey the results along with comments and suggestions for remedy to be sent to the interested parties. If the plan passes, then the results of the examination may be archived, and the final steps of the transaction handed over to a manual or automated title system, while the survey data may be inserted into a digital cadastre database.